Sunday, March 23, 2014

1000 Likes Giveaway!

As promised ... a 1000 likes GIVEAWAY!

To celebrate how awesome you all are, and to thank you for liking my facebook page,
I'm hosting a giveaway!
I'm also hosting a RELEASE EVENT on my facebook page, so make sure you join it so you don't miss out on all of the awesome giveaways from not only me, but multiple authors & bloggers.

'For Now' will be released on April 15th and prizes will be awarded soon after.


Good luck!


Wednesday, March 12, 2014

Author Anxiety

A little bit of me....
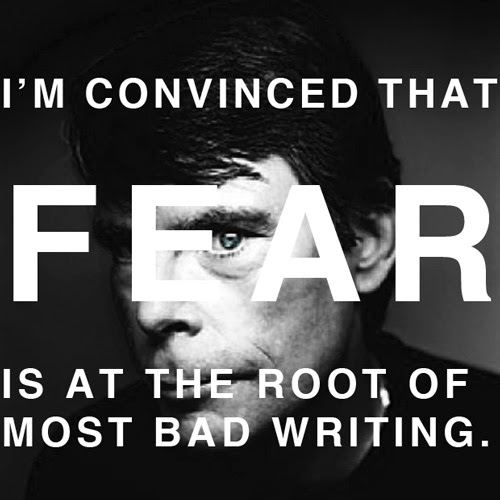
A month or so ago, I was in a funk on where I wanted to take book 3 in the 'For Always' series, so I took a weekend break and wrote 'Haunted', which was a story that had been floating around in my head for a while. Since it's a fairly quick read, I decided to write it on Wattpad, which was/is rather frightening, since there's probably a million people on there from all over the world. Believe it or not, as much as I like to write, it's scary...putting myself (my stories) out there like that for all to judge. However, I'd rather get some bad comments or reviews than have regrets, always wondering 'what if'. The way I see it, opinions are all them, but regret is all me.


I am so glad I faced my fears of failure and actually let people read my stories. My main goal was to write something that people would enjoy reading, and from what I've been told by readers, I've done that.  And I know that everyone isn't going to like my writing, which is expected. There are actually people who don't like Harry Potter *gasp*, and that's going to happen to every writer, even the best. But I have accomplished not only a goal, but a dream, and no bad review or comment can take that away from me at this point, so my fears had been inane.

The reason I am writing this is for aspiring authors, writers, story tellers, whatever label you want to give yourself. Don't let the fear of failure take away the possibilities of your dreams. Not succeeding is not failing; you only fail when you don't try.

Am I a seasoned writer with several books and published works under my belt? No. Did I go to school for writing? No. You don't have to make it big as a best-selling author or go to school for years to achieve success. Writing comes from the heart. Am I saying don't go to school to better yourself? No. But some people have gone to school for years and might be able to write, and write really well, but they still can't tell story. That's what's important. Readers have to feel the words that you're writing. Hearing someone say, "I loved your book!" or, "This story is great. When is the next one coming out?" makes me all warm and fuzzy inside and lets me know I've accomplished what I set out to do. The best compliment someone can give me, or any other writer/author, is a good review.
If you love to write, write! That's what I do, all the while hoping for the best; and sometimes, the best will just happen. For instance, the story that I mentioned before, "Haunted", is currently a featured story on Wattpad with more than 73,000** reads so far (over 71,000 in less than a week!). It's currently #1 in paranormal and #3 in non-teen fiction and has over 800 comments, most of them good ones (☺). Wattpad even sent me a message that informed me that they put my story on one of their reading lists. Am I making any money off of this story? No. But what I am getting from it means so much more to me than money. Now don't get me wrong, 'Haunted' also has a few bad, even rude, comments, but who cares? The good far out-way the bad, and if they didn't, I'd have just removed the story and wrote something else.
**Update: "Haunted" now has over half a million reads and has been published on Amazon!

If your goal is to become rich by writing, this post probably doesn't apply to you. But if your goal is to give people feels, make them smile or laugh, maybe even cry when they read your words, then do it! You won't know until you try. And if you're super nervous, like I was/still am, let people you know read it before you make it available to the world. Make sure it's someone who will be honest and give you positive criticism. Let them know not to sugar-coat anything because the rest of the world surely won't. This is exactly what I did, turning 'For Always', my first manuscript, over to several people who like to read and getting their feedback. When they all encouraged me to try to get it published, I did. And here I am. Book two, 'For Now', is about to be released and I'm working on book three. I'm still amazed when I hold my book in my hands and see my name on the cover.

So, this blog post was originally just going to be a quick little facebook post to encourage other aspiring authors, but since I am a bit long-winded, that didn't go as planned. But then again, nothing usually does.

Okay...I'm done.


Tuesday, March 4, 2014

Social Media Icons on Blogger


Step-by-step guide to social media icon bars for Blogger

Everyone has the icon bar, so they must be easy to make, right? Well, yes, as a matter of fact, they are. However, finding out an easy way to make them . . . not so much. You can always go to each of your social media sites and make a badge to add to your gadget, but who has time to do that? Not me. And they're different sizes and not level, which is unattractive. So, I thought I would help those of you who, like me, just want an easy way to make those cute little icon strips for your blog, as well as other places.

There are so many cute social media icons floating around out there that you literally have hundreds to choose from. The easiest way that I found to get icons was to Google images of them. Google each site separately so that it will only pull up icons for that particular site (i.e. facebook, twitter, etc.), which makes them easier to choose from. There's even cute birds for twitter and little books and even strawberries, like the one to the right, for facebook, but I, myself, am not too fancy and went with the traditional icons so they would be easily recognizable. 

So how can you do this quickly and easily? Like this:


This icon bar is going to be made right on your blog, so open it up.


Get Your Icons Ready
The first thing you want to do is to pick your icons. Once you've Googled and found what icons you want, right click on each one and click on 'save image'. Save them all to a file that would be easily accessible later on. Once you've done this, I'd make sure that all of the saved icons are the same size. I did this by right clicking each photo (after I saved it to a file) and clicking 'edit', which opened it with paint, or you can go to your paint program and just open the icon and re-size it. I re-sized all of mine to 48x48, but you can choose whatever size will allow them all to fit into your sidebar. (If you don't have paint, try another photo editing program. There are even some free editing programs on the web, such as fotor and pic monkey.) Once you've got your icons ready, then you can move onto step two.

Upload Your Icons
To upload your icons, open a new post on your blog, which will never be published. Click on HTML (not Compose) so that there won't be any spaces between the icons. Click on the 'Insert image' icon, just like you normally would when inserting a photo into a post, and upload each of your icons. Once you've done this, click on Compose and it will show you how your icons look. To center them, select them all (CTRL+a) and click on the 'Alignment' tab at the top and choose center. Once the icons have been uploaded and centered, you are now ready to link them to your sites.

Linking Your Icons to Your Sites
To link your icons to your sites, just click on the icon you want to link and click 'link' at the top of the page. Nothing will happen, so do it again. The second time you do this it will pull up a window to link the icon to a website. Just fill in the site you want it linked to and click 'OK'. Once all of your icons have been linked to your social media sites, you are ready to add them to a gadget.

Add Your Linked Icons To a Gadget
The hard part is over. ☺
Now all you've got to do is make a social icon gadget. Open your blog in another window so that the post you've been making your icons on is still open. Once your blog is opened, go to design and click on 'layout'. You will see an 'Add a Gadget' box and you want to click on the one you want to add your icon bar to. Once you've clicked on it, find HTML/Javascript and click the '+' sign. Now, click back over on the post page where you made your icons. Click on 'HTML' and copy the codes (CTRL+a, right click, copy). Once you've done this, click back over to the blank gadget page and click in the empty box. Right click and paste the codes into the box. Give it a title, such as 'Connect With Me' and click save.

That's it! You might have to move your new icon gadget to where you want it, but other than that, you're done. Wasn't that easy?

These are the icons I used, but like I said, there are many different styles floating around.
I hope I've helped in some way!